

Senior Thesis - Spring 2013
Overseen by Professor of Art, Boris Zakic, and assisted by Department Chair of Theatre, Dr. Ed Smith (which ironically were the same two professors that taught my first college art class), this was the final art course for the graduating art students. Our exhibit, why is this happening?, showcased the work of five senior artists of spring 2013. My thesis was a 3D animated short titled Cube, and it featured a robot, lost in a cubic world with a mysterious object. This project made use of Autodesk Maya and MotionBuilder, iPi Mocap Studio and two Microsoft Kinects.
Thesis
This project seeks to narrate a visual story that once existed only in my imagination. Visuals play a large part in my project because I personally respond to imagery, and in this case moving imagery. The realm of 3D animation has always intrigued me ever since I took an animation class in high school. Although this form of art could exist in 2D animation or even in comic form, I prefer the realism of 3D animation to narrate my story.
This project involved several computer animation programs, some were used for motion capture and the others were used to model the character and world, and each spanned across both Windows and Macintosh operating systems. This project also involved a dedicated team of talented individuals. While I directed and animated the story, Meredith Cave was the talented actress who performed with motion capture for the scene, and the unsigned artist Michael Levy allowed me to use his music.
My visual influences have come from the masters at Disney’s Pixar Animation Studios. This studio puts years of production into their movies, and their mastery of visual quality and storytelling amazes me. Brilliant artists and other talented people pour their souls into a single movie, which inspired me to create an animated short. My narrative influences have come from Bill Watterson’s Calvin and Hobbes comic series. I grew up with these comics, but their stories continue to evolve to my understanding. When I was young, theses comics were light-hearted humor, but looking back on them now I realize they contained life lessons and different outlooks on life.
Much like my animation, I intend to indulge the audience with a visual spectacle while still engrossing them with a thought-provoking message. I was also inspired by the themes of the Greek myth of Sisyphus, and the music I chose was also inspired by Greek instruments.
Pre-Production
As I began this process, I was getting into a world that most would need teams to accomplish, and I felt the consequences of using a minimal staff to create this film. The first step was the story, which dealt with themes close to Sisyphus and the entrapment of the mind.
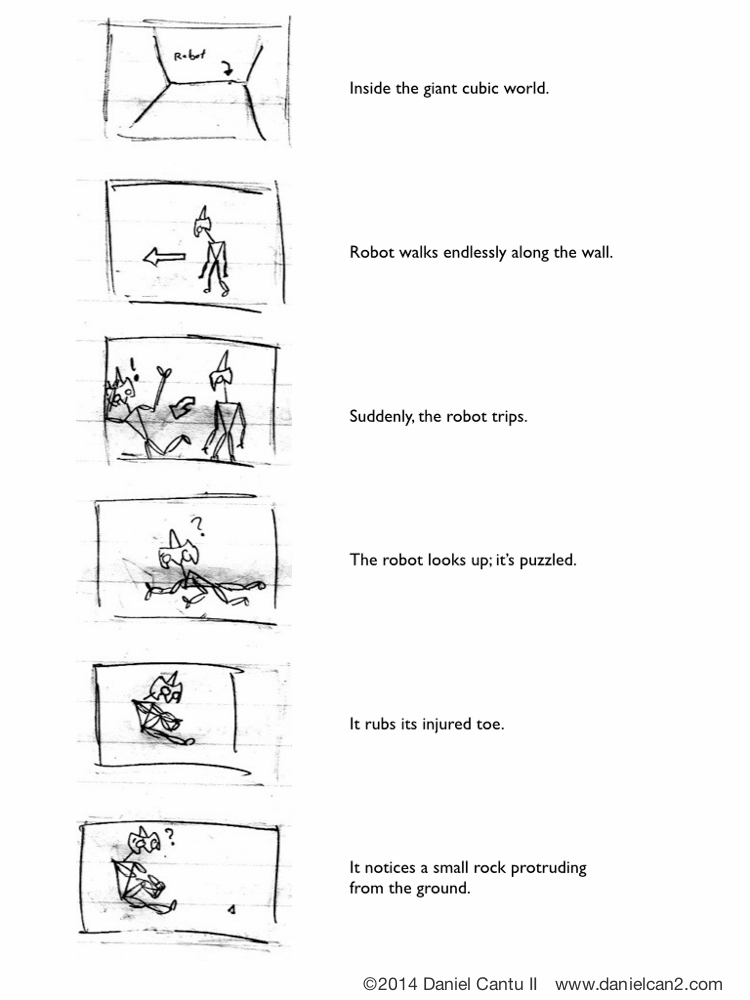
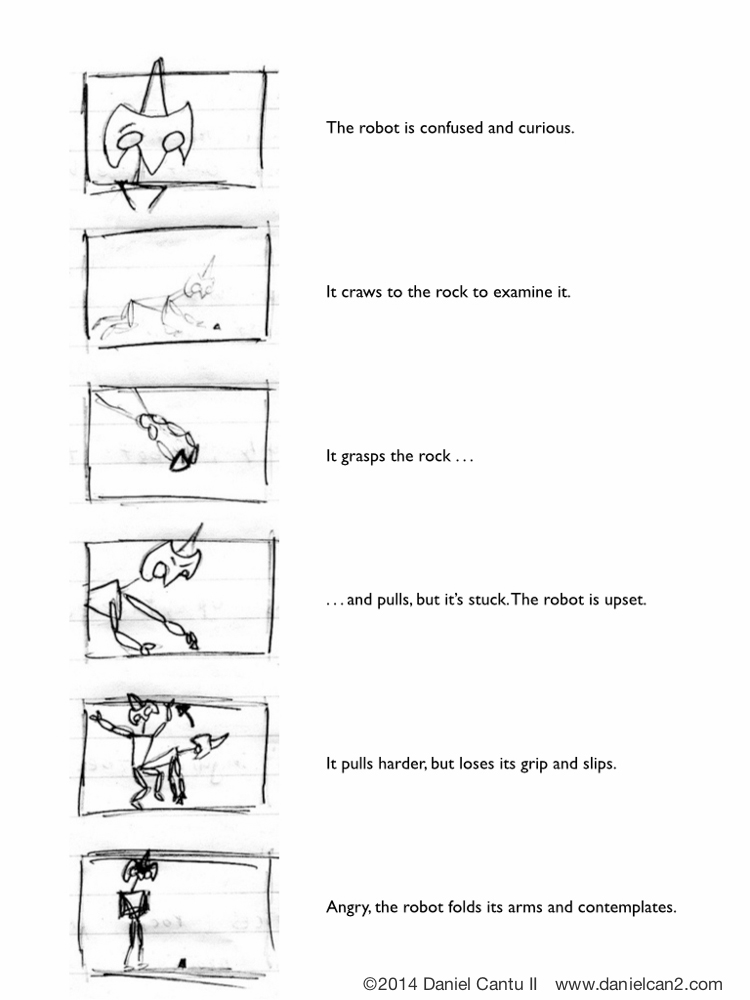
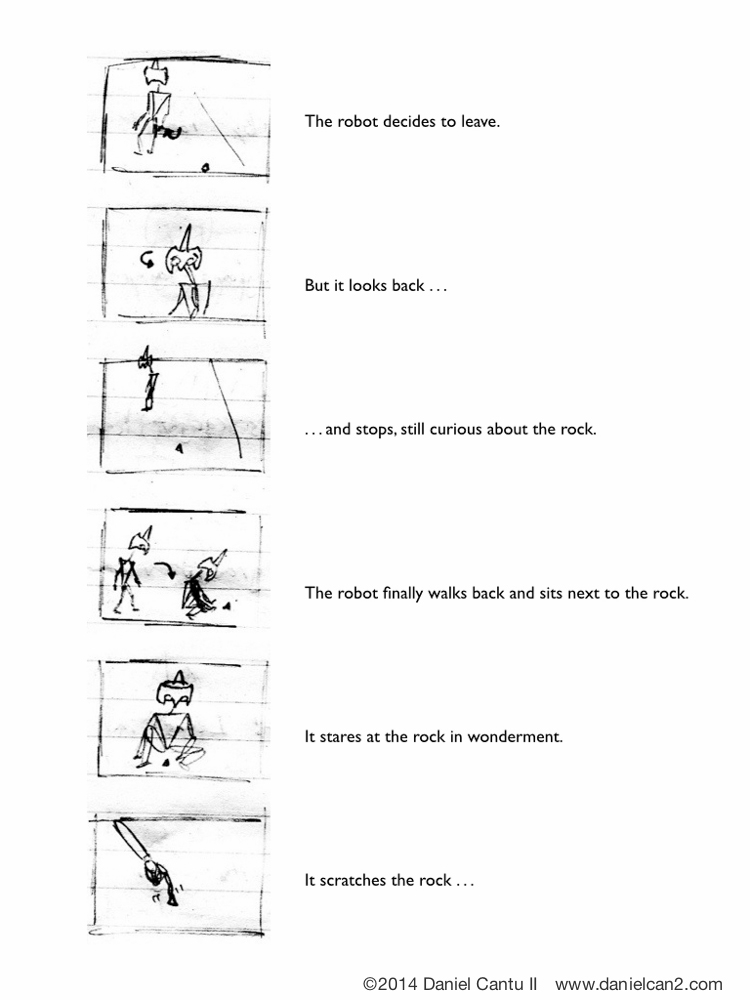
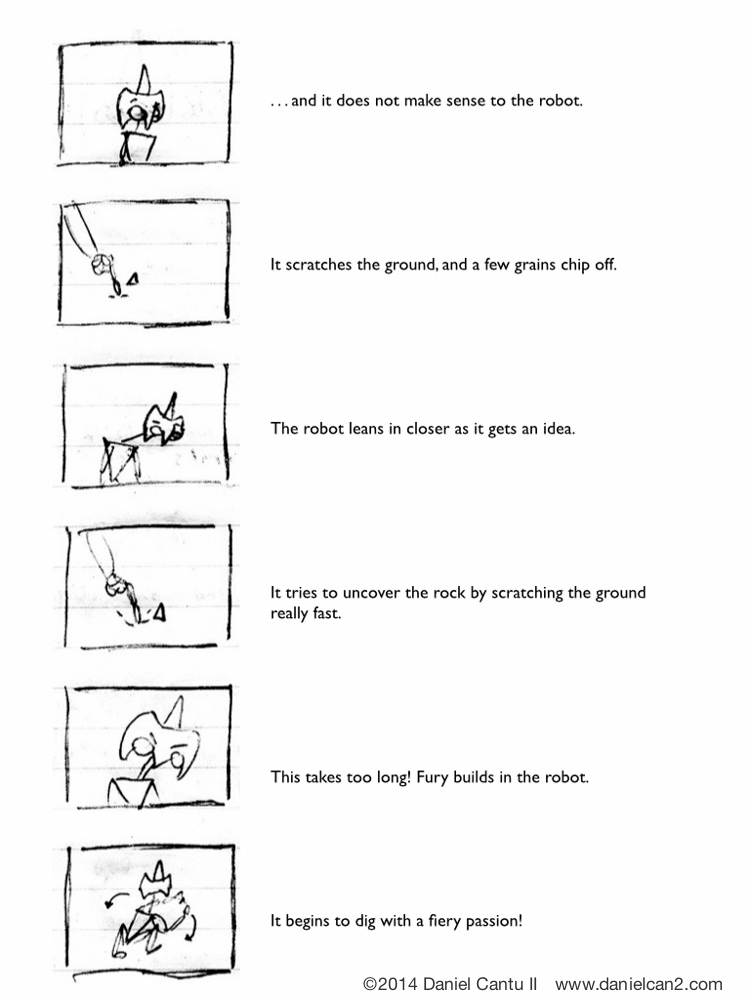
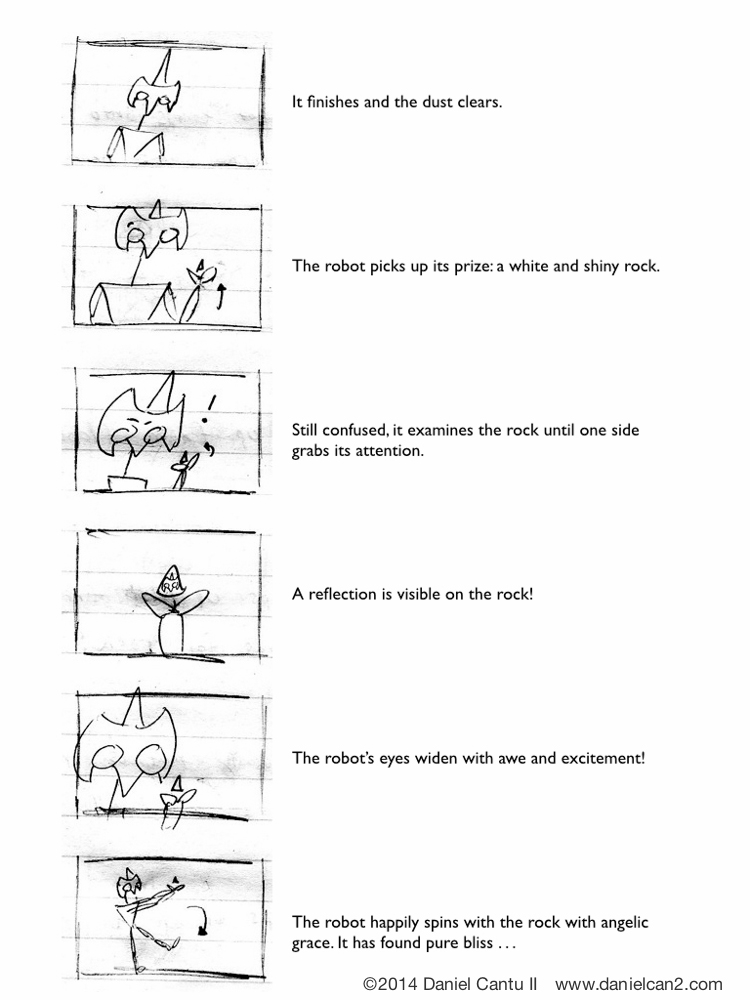
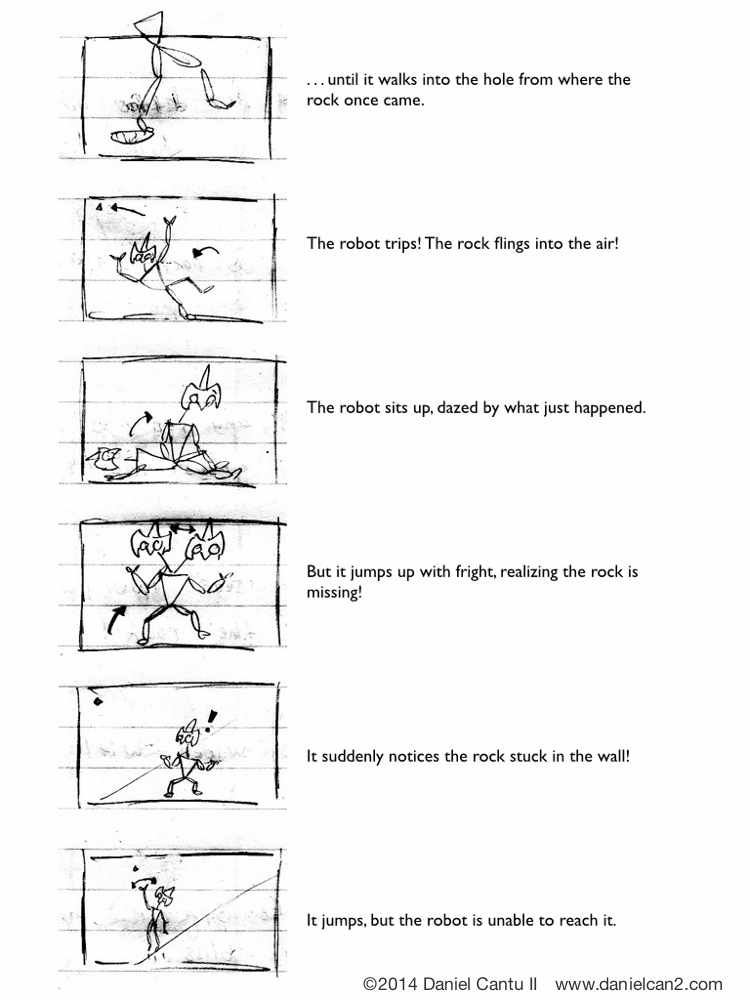
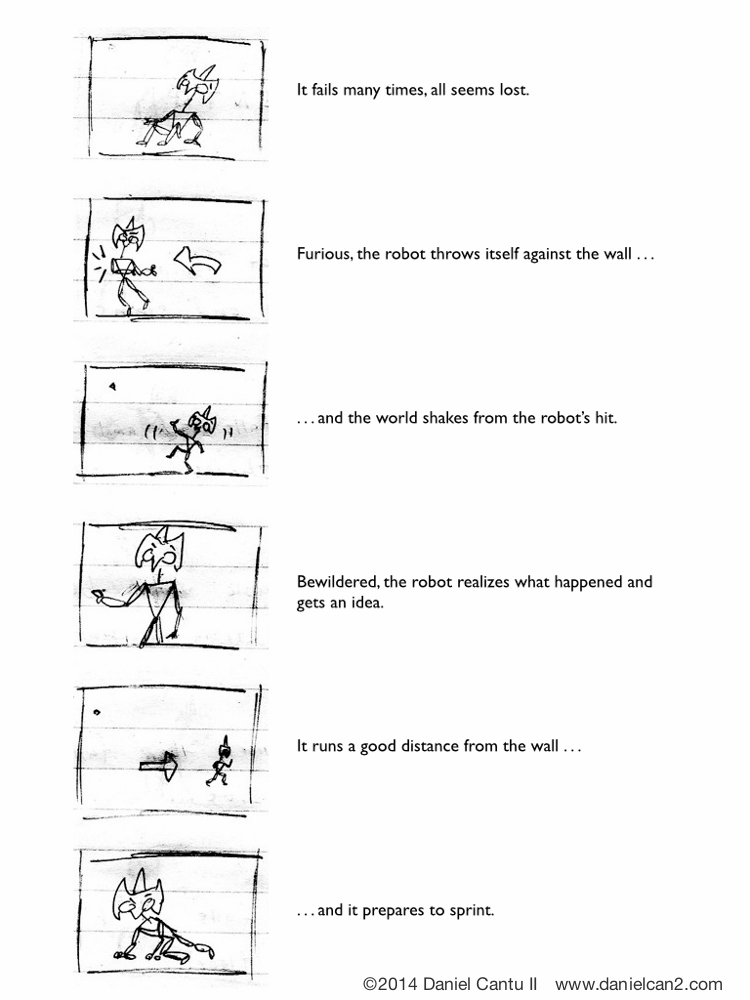
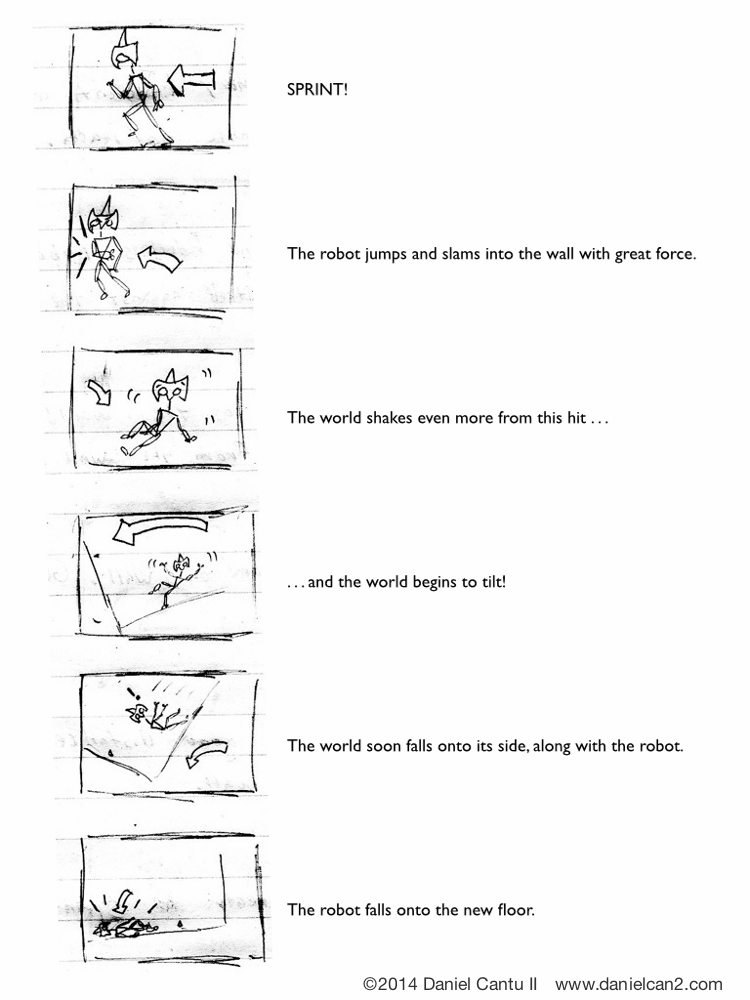
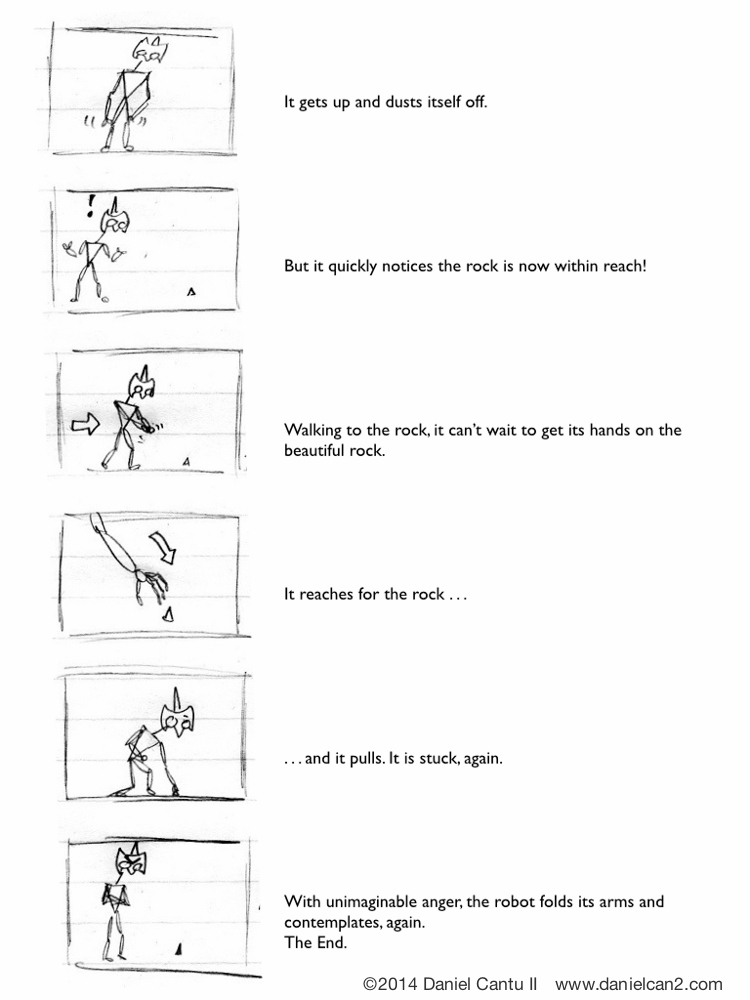
Storyboarding/Layouts:
My "script" was actually both a storyboard and a layout. I used this amongst my actress and critics to visualize the story.
Model Sheets:
Since I had created the robot during my Independent Study, I was able to bypass the need for model sheets.
Animatics:
The entirety of the narrative was in my head, and since I was creating the entire film by myself, I didn't know about the need for an animatic, although it may have helped in hindsight.
Production
The whole production of the film was a creative endeavor, one that I was unaware of its amount of fun and complexity.
Modelling:
The only new 3D model that I had to create was the cube-world that the robot existed in. I also used a free online texture to apply a stone-like quality to the surfaces.
Lighting/Texturing:
The lighting method of a 3D scene also works in conjunction with the colors, materials, and textures. Here are some images that shows the design process of the cube-world:


Rigging:
At this point, I have never rigged a 3D character in the traditional manner, so I improvised with motion capture. With the impractical yet affordable setup of Autodesk MotionBuilder, iPi Mocap Studio, and two Microsoft Kinects, I was able to film an actress and bypass the rigging process, which will eventually plague me later. Here are some images that show the process from motion capture, to skeleton, and to rigging:


Animation:
Now came the most fun and challenging part. My animation was only possible with the help of an experienced actress, Miss Meredith Cave, whom I worked with on several theatre performances. She was exceptionally great at character acting, which requires a diverse skill set of body language for stage performances.
Here is a video of several production elements that I have explained thus far, to which there are various texts below it to explain each chapter:
Test Shoot:
The first part of this Behind the Scenes show how a person is converted into a 3D character. The first step is performance: the actor/actress performs a scene (in this case a simple dance). The performance is then scanned by motion-capture equipment and then the scene is digitized into "Motion Capture Data." Once this step is done, the data is then transferred into another program so the data can be applied to the 3D model via "Characterization." Lastly, the robot is then exported into an advanced animation program to perform the last step, "Render."
Falling Scene:
During the movie, the character is supposed to trip and fall. Due to safety, I did not want the actress to fall on her face like the scene intended for, so we performed a half-fall. This can be somewhat seen in the movie, but I used a well-place camera to crop out the "landing."
Pulling Scene:
Just like what the video implies, I often acted out a scene to show the actress what I had in mind, and then she would perform the scene with better animation. On a side note, this lady is a marathon runner and in great shape, I simply sit at a computer and make art, and I was only able to record one hour during the first shooting because I was too tired after acting out the scenes.
Running Scene:
Bigger animation studios have a warehouse-sized motion capture technology to work with. I, on the other hand, have a simple mocap tech to use, which limits my space to 7ft by 7ft. I wanted a good running scene for my movie, so managed to get help from the gym facility at my college. Thankfully spring break just started and everyone was done using the gym.
The Mask:
In live theatre, facial expressions are not as visible as in film, so the actors have to be dynamic with their faces. This movie, however, does not require facial animation. This character had to be expressive with its body, so I created a mask for the actress to use. Just like Greek theatre, body language was more important to the audience than facial expression, and I wanted to implant this in the actress's mindset.
Post-Production
After everything was filmed and animated, I now had to compile everything into the final product, which was the most labor-intensive process of the entire project.
Rendering:
The largest hurdle that I was faced with was rendering everything in a timely manner. The computer I chose to work with at the art building happened to be faster than the others, so when I attempted to create a render farm with 16 iMacs, I gravely underestimated the time that was needed.
Sound Editing:
The original plan for a score was to work closely with a student composer, but he was student teaching and that plan fell through. So, as an alternate solution, I contacted an independent musician, Michael Levy, and I was allowed to use his music for my project.
Video Editing:
My editing was makeshift and possibly wrong, since I have never taken any class to learn how to edit animation. That being said, I was graced with the criticism and assistance from Dr. Ed Smith.
Here is a video selection of post-production clips, to which there are various texts below it that explain each chapter.
Motion Capture Data:
I used motion capture software and equipment to film my movie. Using iPi Soft Studio and two Microsoft Kinects, I was able to perform motion capture at a reasonable price. In the video you can see the depth data and the character side-by-side.
Animation (Low Resolution Mocap):
Although a low-res capture is considerably faster to render, it is not very accurate and it does not capture small details in body movement, which results in "shakes."
Animation (High Resolution Mocap):
Using Autodesk Motionbuilder, I was able to translate motion capture data into a 3D model. Using Autodesk Maya, I was able to model and render the character into a movie-quality version.
Final Movie (Rough Cut):
This rough cut was very rough, as you can see that some of the character model wasn't fully working (the spine wasn't functional). But this rough cut helped me discuss with a professor on better camera angles and transitions. The music that I eventually chose was provided by Michael Levy, who specializes in lyre instruments. I also used iMovie to edit the final film together.
Release
In conclusion, creating a 3D short film singlehandedly may have been the most challenging things I have ever done, but it was just as much fun. I was an amateur in this field, but it opened my eyes to the possibilities that animation can take me if I improve my skills.
That being said, here is my little film: Cube.
